Transaction
Dashboard
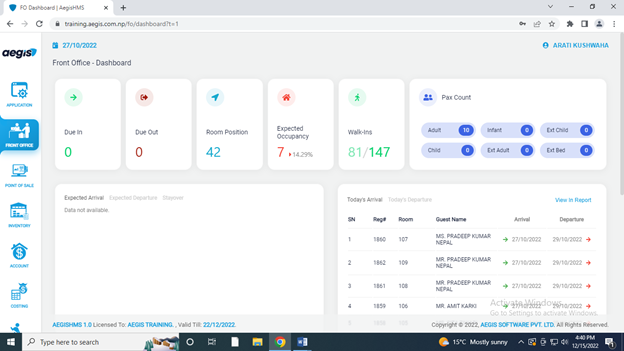
It is the dashboard used for FO activity briefing. Figure inserted below is the Dashboard of FO.
Reservation:
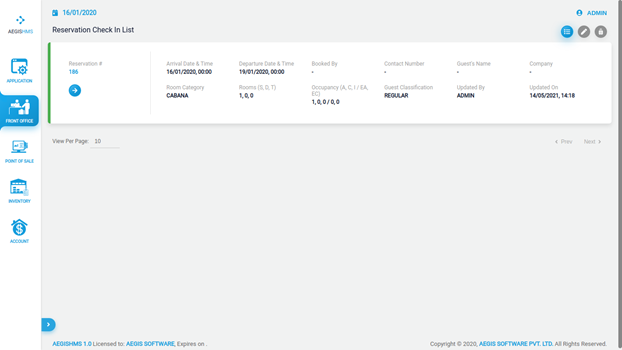
‘Reservation’ shows the list of all the reservations made with the reservation number and other details.
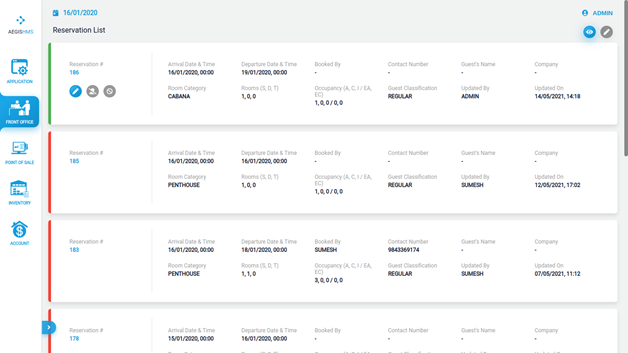
The green color indicates that the guests haven't checked in from the reservation.
The red color indicates that guests have checked in from the reservation.
The orange color indicates that some of the guests of same reservation haven't checked in yet from the reservation. (Partial check-in)
Press Alt+ F to bring a filter menu.
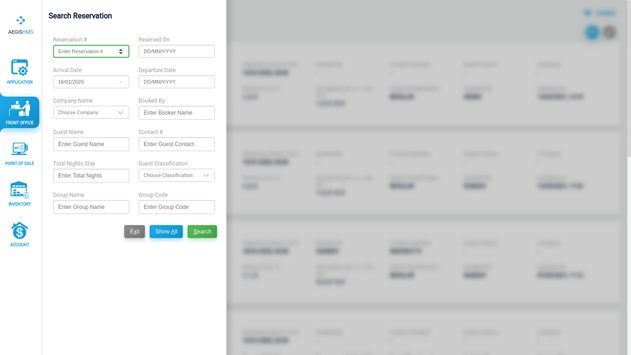
Then, click the Search Button or press Alt+ F to view your desired reservations.
Press Show All button or Alt+ A to view all reservations and Alt+ X to exit the filter menu.
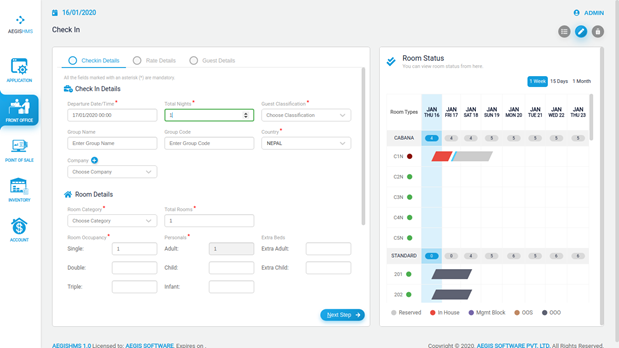
To make a room reservation, go to the Front office >> Transaction >> Reservation. Then, press Alt+2 or click on the pencil icon on your top right corner.
After that, you will see the following screen, and you need to fill in all the required fields. Then, press Ctrl+ S to save the information.
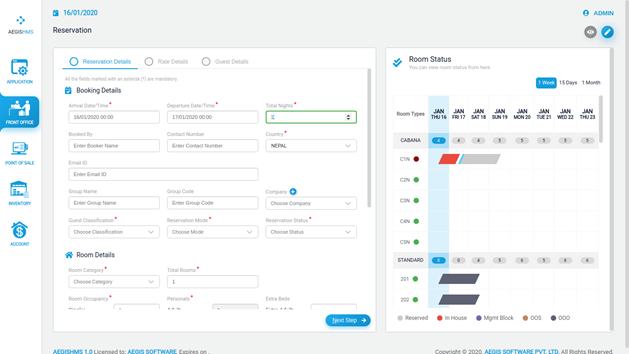
Enter the arrival and departure date/time and, the system will automatically update the value in the 'Total Nights' field.
Conversely, you can enter the total nights and, the system will update the departure date/time automatically for the arrival date/time you have entered in the system.
After that, you need to fill in all the required fields and press Ctrl+ S to save the information.
To move to the next step, you must fill in all the mandatory fields.
If any required information is not fill in, the system will show a red color as a warning sign to users.
Click the Next Step button located on the right-bottom or press Alt +N to go to Rate Details.

After that, you need to fill all the required fields of Rate Information and then press Ctrl+S to save the information.
When all the rate information is filled in, you can see the rate details.
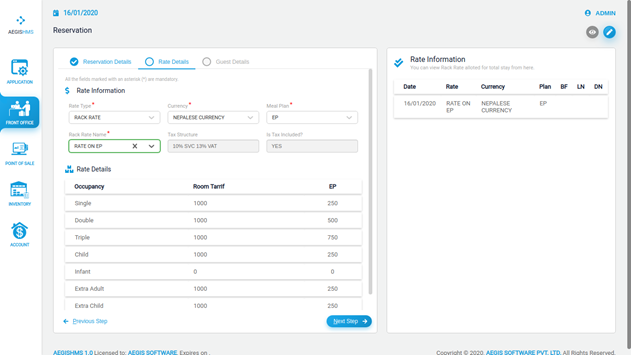
The rate details are displayed (read-only) according to occupancy and meal plan. In the case of the discount rate, you can edit the rate details.
You can press Alt +N to go to Next Step or Alt+ P to go to the Previous Step.
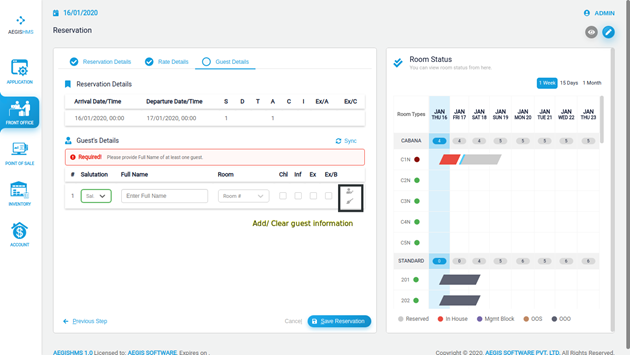
Guest Details
Here you can see all the details filled in the previous steps.
You can press Alt +N to go to Next Step or Alt+ P to go to the Previous Step.

Then you need to fill in the required information in ‘Guest Detail’ to add the guest details in the system. You can choose a room to assign, although it’s not mandatory.
Now click on Save Reservation or Alt+S to save the reservation.
The reservation will display on the reservations list by pressing Alt+1.
Room Status
In a given figure is a graphical representation of the hotel position. The Room Status is located on the right side of the Reservation and Check-in page.

On the left side, there is list of Room types in the hotel such as Cabana, Standard etc.
Click on the room type to see all the room number of that particular room type.
There is a circle on the right side of the room number. The color of the circle has a special meaning and indicates various room information.
Note:
· A red circle indicates that room is currently in-house.
· A maroon circle indicates that room is currently in-house & dirty.
· A green circle indicates that room is clean.
· A yellow circle indicates that room is dirty.
On the top right corner of Room Status, you can see three options: 1 week, 15 days, 1 month.
Toggling between these options will show the hotel room position for the selected duration.
You can see the available rooms for a particular day below the date in the row of room type.
For example: Cabana (Room Type) has 4 available rooms on Jan 16, Thursday.
The parallelogram in the row of each room number represents the length of stay.
The color of parallelogram has its own significant meaning.
Note:
· The red color represents In-house.
· The gray color represents reserved.
· The purple color represents Management Block.
· The brown color represents Out of Service (OOS).
· The black color represents Out of Order (OOO).
Check-in
To Check-in, go to the Front office >> Transaction >> Check-in
This shows detail of guests in a list who have made reservations.
To Check-in without reservation, press Alt+2 and a form will be shown similar to that in Reservation.
Enter the necessary information in Check-in Details and Rate Details. On the guest details, you have to assign rooms as well to check-in.
Press Alt+ C to save the check-in.
Walk-in
To check-in the walk-in guest instantly, go to the Front office >> Transaction >> Walk-in
Press Alt+3 to go to Walk-in
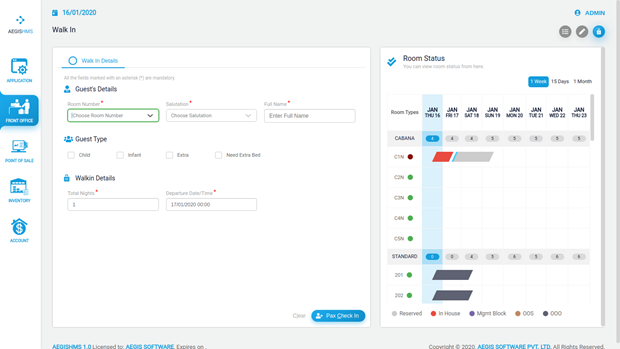
Walk -In is similar to check-in and it is used for quick check-in. Only a single pax can be checked in. Only one room can be selected at once.
After filling all the required information, you can click on ‘Pax Check in’.
Receipt (Advanceor any kind of received amount from room or Reservation)
To add the Receipt from a room, go to the Front office >> Transaction >> Receipt.
Receipt is the amount received in advance from the guests.
Press Alt +2 to add the Receipt. After that, you will see the following screen, then fill all the required fields. Press Ctrl+S to save the information.
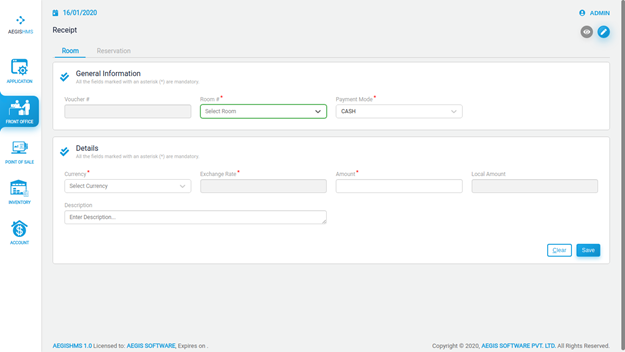
In the general information section, Enter room number and payment mode.
After that, you need to enter currency and the amount received. You can also keep the description for amount received and save it by Ctrl+ S.
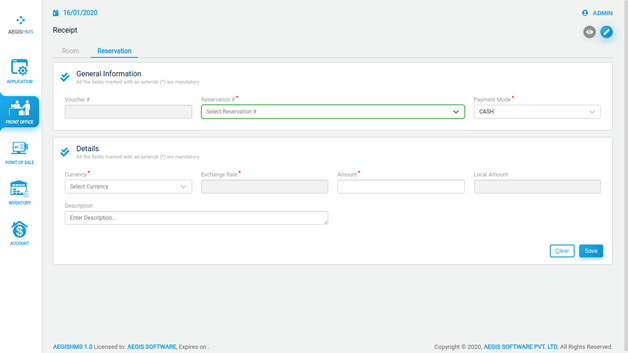
Add The Receipt from Reservation
To add the Receipt from reservation, select ‘Reservation’. Then press Alt +2 to add the Receipt. After that, you will see the following screen, then fill all the required fields. Press Ctrl+S to save the information.
Payment (Paid out or any kind of return amount to room or reservation):
To add the payment to a room, go to the Front office >> Transaction >> payment
Payment is the amount given by front office to the guests.
Press Alt +2 to add the payment. After that, you will see the following screen, then fill all the required fields. Press Ctrl+S to save the information.
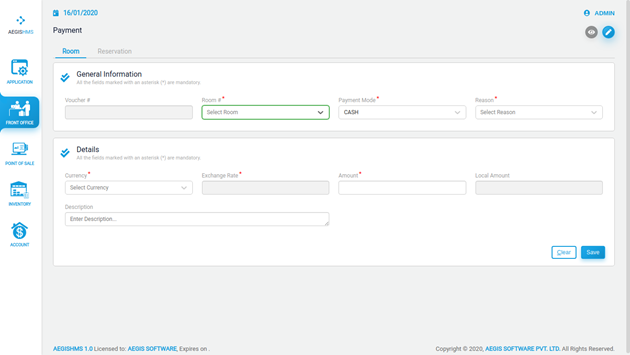
In the general information section, Enter room number and payment mode.
After that, you need to enter currency and the amount paid. You can also keep the description for amount paid and save it by Ctrl+ S.
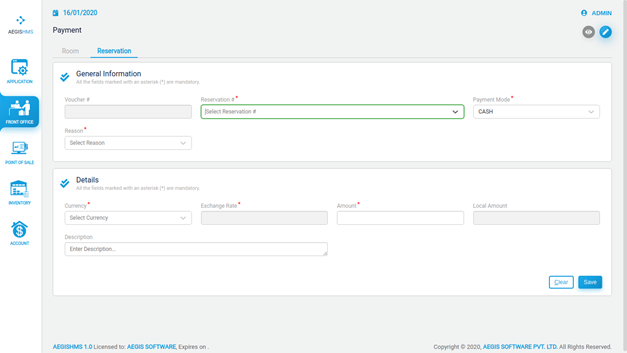
Add The Payment from/to Reservation
To add the payment from/to reservation, select ‘Reservation’. Then press Alt +2 to add the payment. After that, you will see the following screen, then fill all the required fields. Press Ctrl+S to save the information.
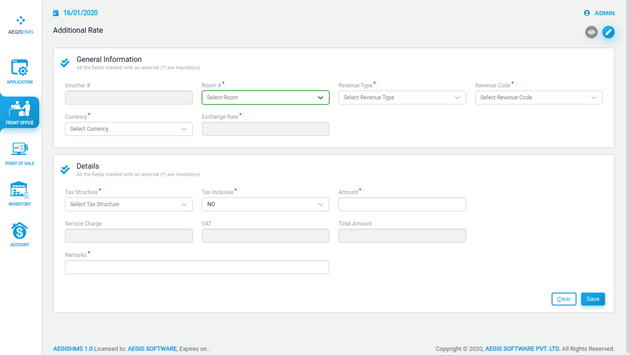
Additional Rate
These are rates other than rack rate and meal plan. It can be used to apply rate for extra bed, miscellaneous charges and day use guests as well.
Press Alt +2 to add the additional rate. After that, you will see the following screen, then fill all the required fields. Press Ctrl+S to save the information.
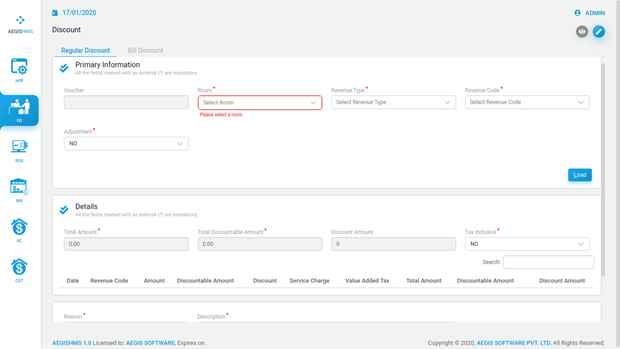
Discount
To see list of discounts, go to Front office >> Transaction >> Discount
Then, you will see screen given below:
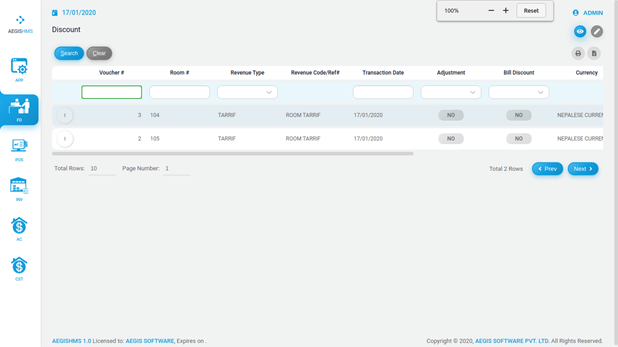
To provide regular discount, press Alt +2. After that, you will see the following screen, then fill all the required fields. Finally, press load botton to upload information.
The Details section will be populated with data after selecting Load.
On the Discount Amount, you can enter your desired discount amount and fill other required information and press Ctrl+S to save. Press Alt+1 to view the discount made.
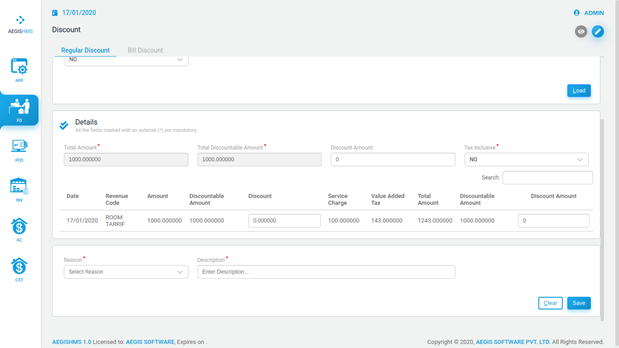
Front Office >> Transaction >> Discount
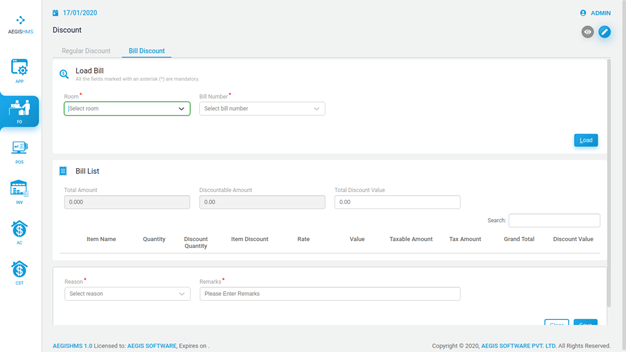
Discount On Bills
To provide discount on bills from module other than front office, press Alt +3. After that, you will see the following screen, then fill all the required fields. Finally, press load botton to upload information.
On the Discount Amount, you can enter your desired discount amount and fill other required information and press Ctrl+ S to save. Press Alt+1 to view the discount made.
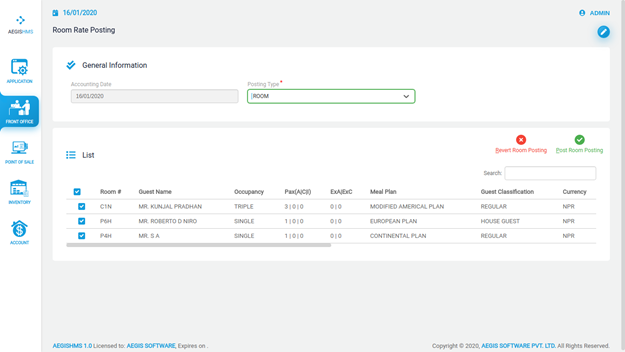
Room Rate Posting
To provide room rate posting, go to Front office >> Transaction >> Room Rate Posting
After that you will see following screen and you also have an option to choose the posting type. On the list section, you will see all in-house rooms with details.
Tick on the room in which you want to post room rate.
Click on Post Room Posting or Alt+ P.
Note:
- Zero rate posted for In-house guest and Complimentary rooms by default.
- Room rate cannot be posted:
i) On departure date.
ii) On rooms that are in the stop release posting = Yes status.
iii) On rooms which are given regular discount already.
Revert Room Rate
To revert room rate, go to Front office >> Transaction >> Room Rate Posting
After that you will see following screen and you also have an option to choose the posting type. On the list section, you will see all in-house rooms with details.
Tick on the room in which you want to revert room posting. And then, click on Revert Room Posting.
Change Rate
Change Rate is used to edit room rate and meal rate for a room.
To change rate, go to Front Office >>Transaction >> Change Rate
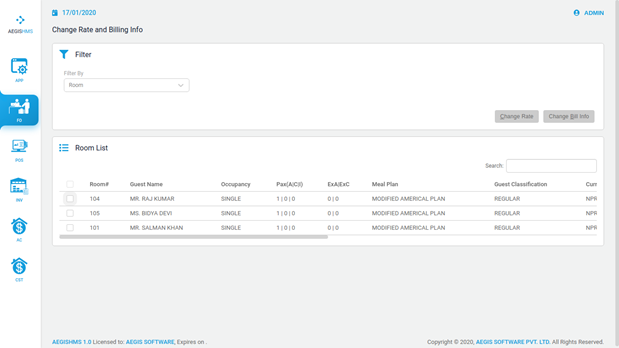
The following screen will be displayed. From the ‘Filter By’ option, you can choose from room, group or company. You need to enter the name of group or company name in the case ‘Filter By’ company or group is selected. The information on the Room List section will be updated accordingly.

You can select the room number from Room List section by selecting the box on the left side. Once a room number has been selected, press Alt+ C to open Change Rate menu as shown below:
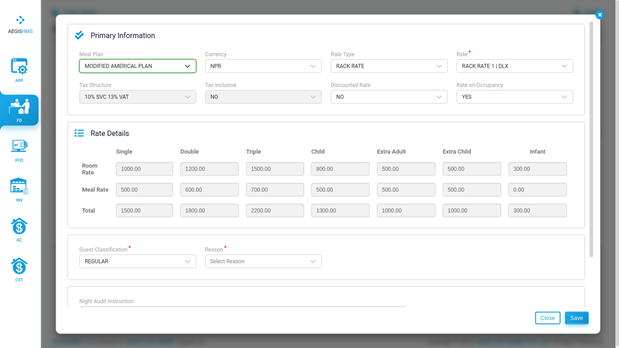
On the Primary Information section, fill the required fields and change Discounted
Rate to ‘Yes’. Now, you can change the Room Rate and Meal Rate values in the Rate Details section.
Select a Guest Classification and a Reason as applicable. Then, press Ctrl+ S to save the information.
Changing Bill Information:
To change bill info, go to Front Office >> Transaction >> Change Rate
The above screen will be displayed. From the ‘Filter By’ option, you can choose from room, group or company. You need to enter the name of group or company name in the case ‘Filter By’ company or group is selected. The information on the Room List section will be updated accordingly.
You can select the room number from Room List section by ticking the box on the left side of the room number. Once a room number has been selected, press Alt+ B to open Change Bill Info menu as shown below:
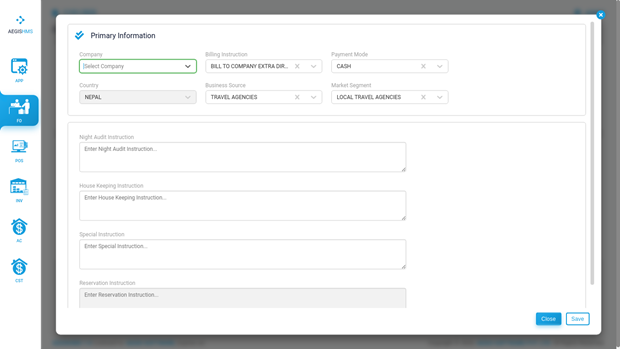
Please select the company whose billing info needs to be changed. Fill all the necessary information and press Ctrl+ S to save it.
In House List
To see in house list, go to Front Office >>Transaction >> In House List
Here you can view and update details of customers who are presently staying in the hotel.
From ‘View by’ you can view details of customers in two ways either, Room wise or Guest wise. You can also further view details by filtering the list from the option ‘Filter By’ at your convenience.
If you view details of client by ‘Guest Wise’ then you will see an option to update guest information.
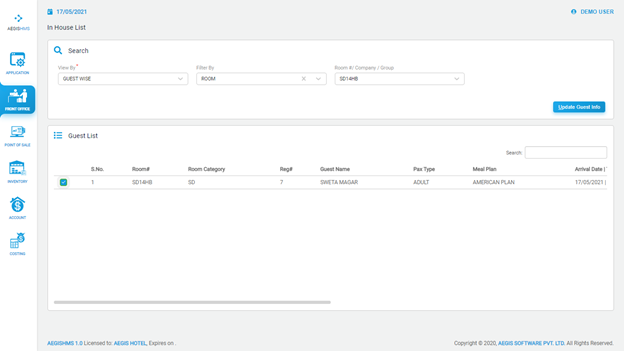
Figure 1 View by 'Guest Wise'

Figure 2 View by 'Room Wise'
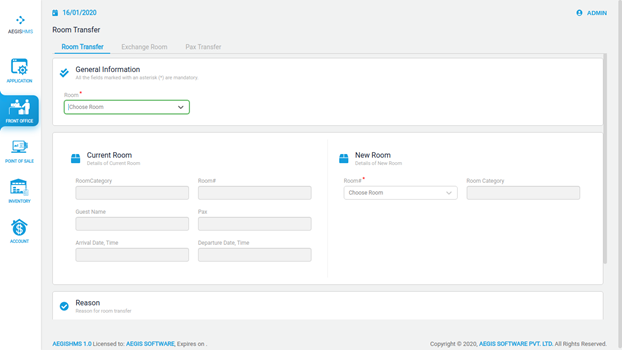
Room/pax (Transfer/Exchange):
To change room/pax, Go to Front Office >>Transaction >> Room/ Pax
Then, you will see following three tabs in the system
- Room Transfer
- Exchange Room
- Pax Transfer
To transfer room, you can select Room Transfer tab or press Alt +1. After that, you will see the following screen, then fill all the required fields. Press Ctrl+S to save the information.
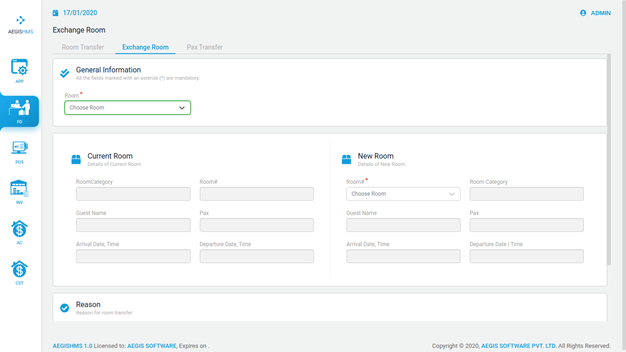
For room exchange, Go to Front Office >> Transaction >> Room/pax (Transfer/Exchange)
To exchange room, you can select Room Transfer tab or press Alt +2. After that, you will see the following screen, then fill all the required fields. Press Ctrl+S to save the information.
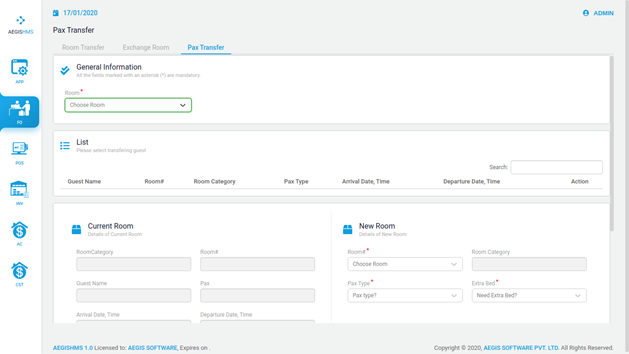
For pax transfer, Go to Front Office >> Transaction >> Room/pax (Transfer/Exchange)
To transfer pax, you can select Pax Transfer tab or press Alt +3. After that, you will see the following screen, then fill all the required fields. Press Ctrl+S to save the information.
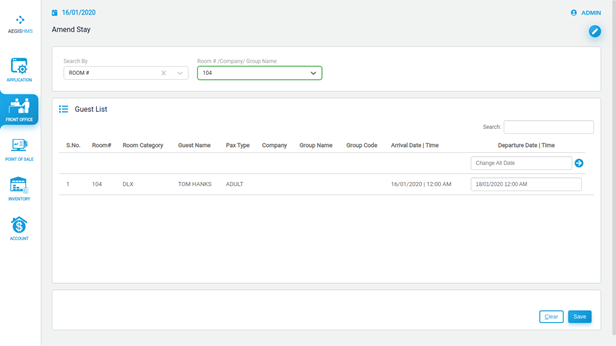
Amend Stay
To amend stay, Go to Front Office >>Transaction >> Amend Stay
You will see the following screen, then fill all the required fields. Press Ctrl+S to save the information.
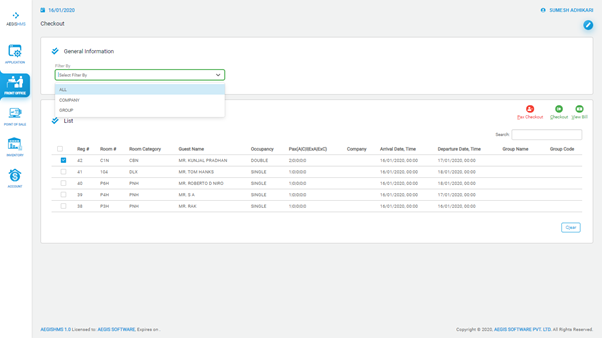
Check Out
It is a process of leaving a hotel after settlement of the bill and returning the room key. Check out is done during the departure time.
To do the Check Out process, go to the Front Office >> Transaction >> Check Out.
You will see the following screen and select category from ‘Filter by’.
After that, you will see three items (Pax Checkout, Clear Room, Checkout) on the right side of a list.
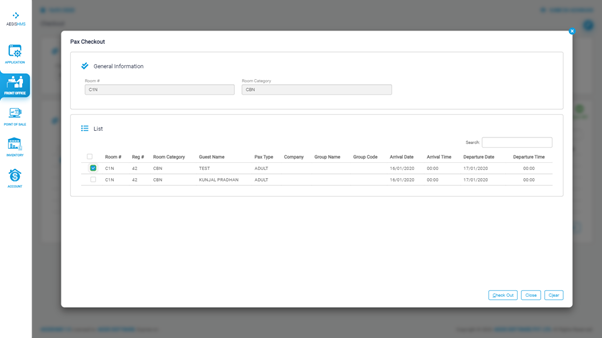
Pax check out
Pax check out is done only in more than single occupancy, it cannot be done in single occupancy.
Select the required list from the checkout list. Then, press Alt+ P to pax check out. You will the following screen, select the list as per required from the pax check out list.
Checkout
One can process the checkout for the selected rooms. To Process, select the desired rooms and clicking on ‘Checkout’ icon.
After making ‘Checkout’ properly one can directly proceed to billing.
Billing
In billing section we can take print out of bill for any of the transaction we want to check out.
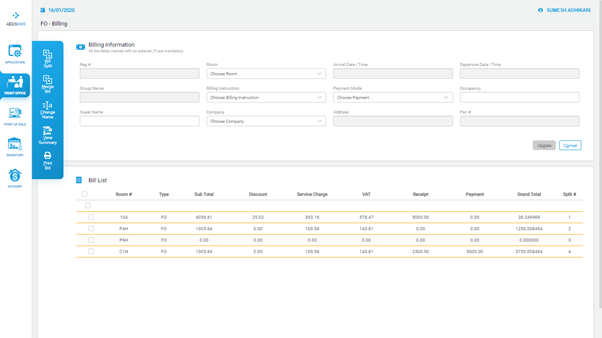
Billing is the process of preparing invoice. It can be done in various ways from Aegis.
Types of Billing are:
Bill Spilt
Bill Split will assist you to split the selected bill according to your choice by amount or revenue code.
To split the bill, select the bill for which you want to split and click on bill split or just Alt+ B.
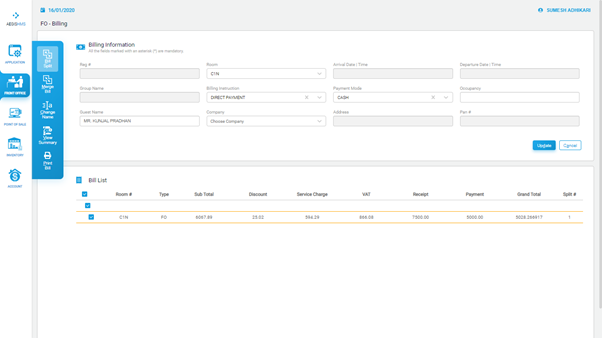
You will see the following screen with the information in pop up module.
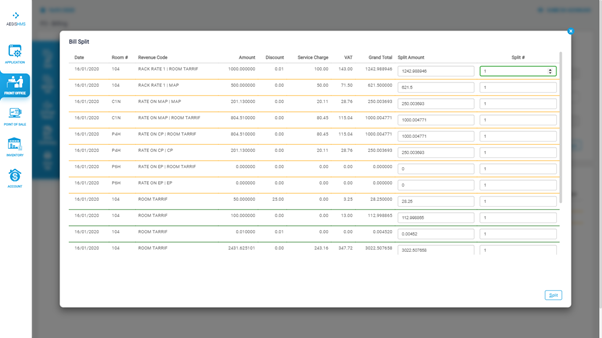
Enter the amount to which the revenue code needs to split and enter the number of bills in split#. Click on split or just press Alt +S to split the bill.
To exit from bill split, click on cross (x) button or just press Esc button on key board.
Merge Bill
It will assist you to merge the selected bill. To merge the bill, select the bills which you want to merge and click on merge bill or just press Alt +M. You will see the following confirmation screen.
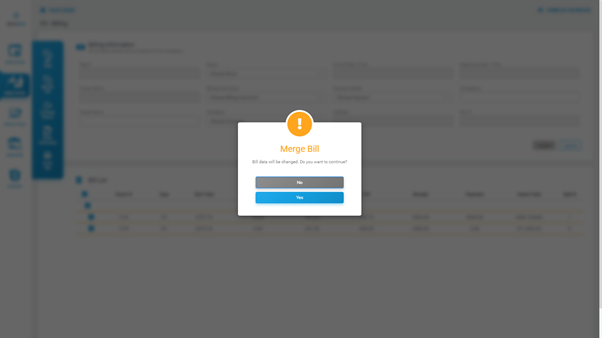
Press ‘Yes’ to merge the bill.
Change Name
Change name will assist you to change the name of bill charge according to your choice. To change the name, select the bill for which you want to change the name and click on change name or just press Alt + C.
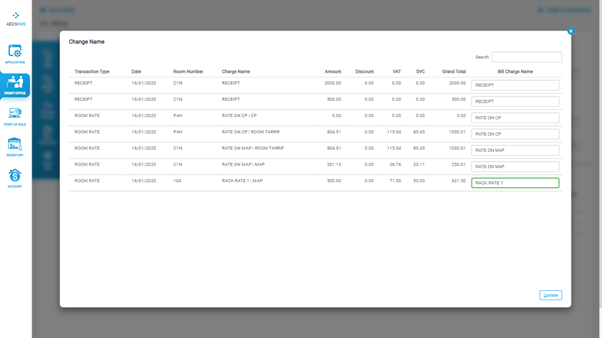
You will see the above screen with information in pop up module. Enter the required name on bill charge section for each list. Click on Update or just press Alt +U to update the changed name in bill. Press Esc to exit from the view ticket.
View summary
It will assist you to figure out the summary of the generating bill. To view the summary of the bill for which you want to see the summary and click on view bill summary or just press Alt + V.
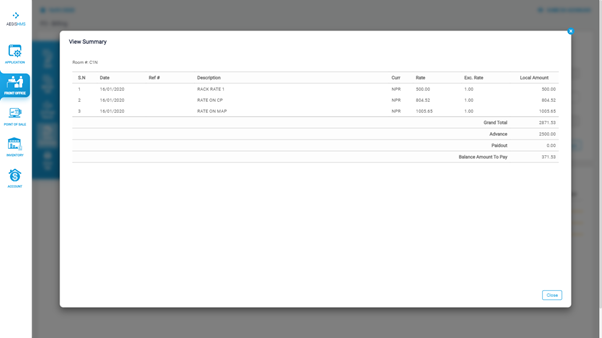
You will see the above screen with the information in pop up module.
Press Esc to exit from the view summary.
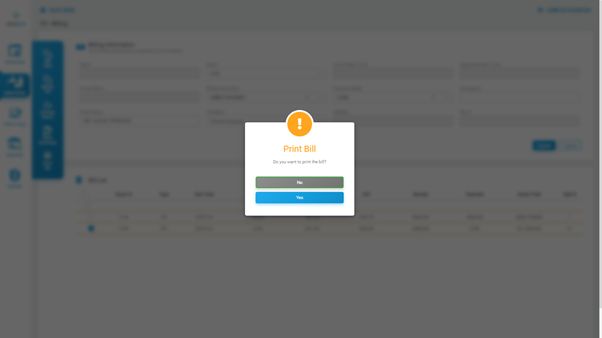
Print Bill
It will generate the final bill. To print the bill, select the bill for which you want print or just press Alt +P. You will see the confirmation dialogue box in pop up module. To confirm the printing click on yes or no for not the print.
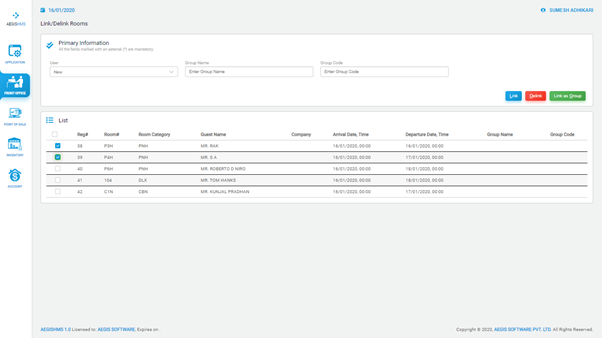
Group and Links
It is process of linking and delinking or connecting and disconnecting one or more group together with the help of group name and group code.
To do the Group and Links, Go to the Front Office >> Transaction >> Group and Links.
You will see the following screen and fill up the primary information by filtering by existing or making new group. After that, you will see the list, click required list for link and delink. Press the Alt + L to link with each other. Press the Alt + D to delink with each other. And finally, press the Alt + G to link with each other as a group.
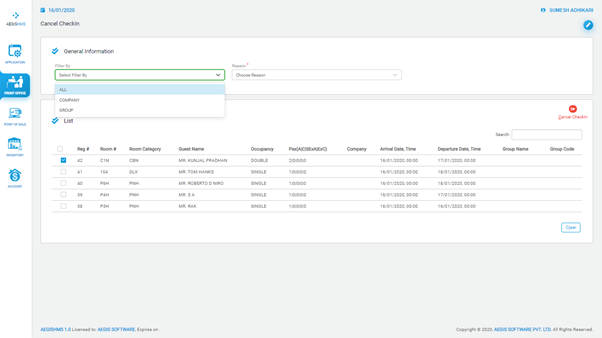
Cancel Check In
It is a process of cancelling a check in.
To do the Cancel Check In process, go to the Front Office >> Transaction >> Cancel Check In.
You will see the following screen and fill up the general information by filtering by All, Group, Company and give appropriate reason of cancel. After that, you will see the list, click required list for cancel check in. Press the Alt + C to cancel check in, press the Alt + L to clear it.
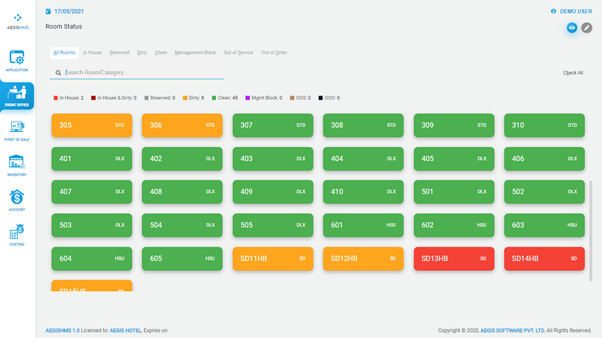
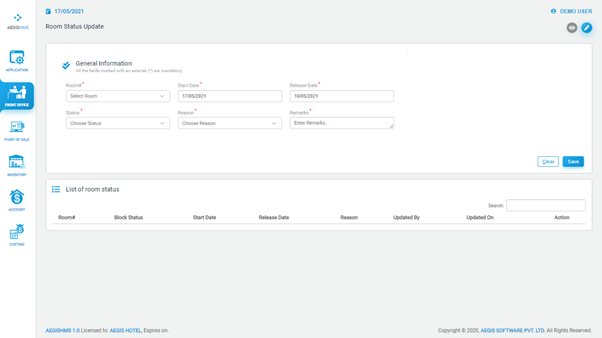
Room Status
To view the room status, go to the Front Office >> Transaction >> Room Status.
You will see the following screen where you can view the current situation of every room. This will provide you an insight into your rooms.
Here, different colours have different meanings for example, ‘Green’ colour shows that the room is clean, ‘Yellow’ colour shows that the room is dirty, and so on. If rooms are cleaned and you have not updated that information in the system then you can update it from this page too.
To view you can press Alt+ 1 and to edit Alt +2 or you can click on ‘Pencil’ icon.
If you press Alt +2 or click on ‘Pencil’ icon then you will see following screen.
You can select room, date and reason to easily change current status of any rooms. You can give different status like ‘Out of Order’, ‘Out of Service’, ‘Management Block’ etc. as per your requirement
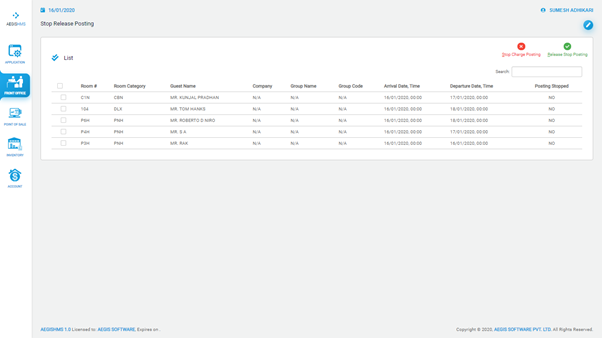
Stop Release
Stop Release helps to stop the charge posting as well as release the stop charge posting.
To do the Stop Release process, go to the Front Office >> Transaction >> Stop Release.
You will see the following screen. After that, you will see the list, click required list for stop or release the charge posting. Press the Alt + S to stop the charge posting. Press the Alt + R to release the stop charge posting.
Bill Settlement
Bill Settlement is the process of settling bill in various payment mode as per guest’s feasibility. Bill can be settled on specified in different categories of Cash or Credit modes. It is done after printing the final bill.
To do the Bill Settlement, Go to the Front Office >> Transaction >> Bill Settlement.
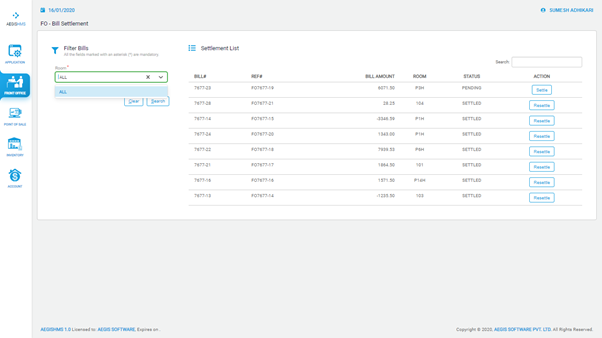
On settlement screen, select the room and click on search or just press Alt +S
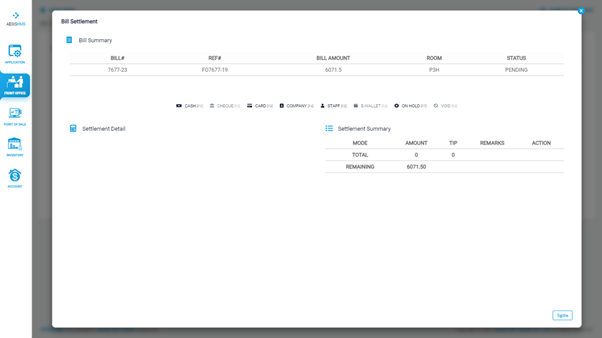
Select the bill to be settle/resettle. A pop-up screen will open with all the bill information. Select the appropriate settlement mode as per the requirement, add the amount and tip. Add or press Alt + A to add and finally settle the bill or just press Alt +E.
Credit Note
Credit note is passed normally when sales return done from bills with Credit Settlement. To pass credit note, Go to the Front Office >> Transaction >> Credit Note.
You will see the following screen. After that, you will see the date. Put the valid date. You will see the billing list. Select the required bill list.
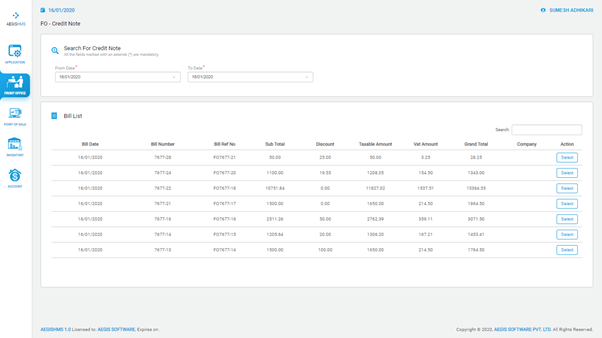
Search button also helps to search align.
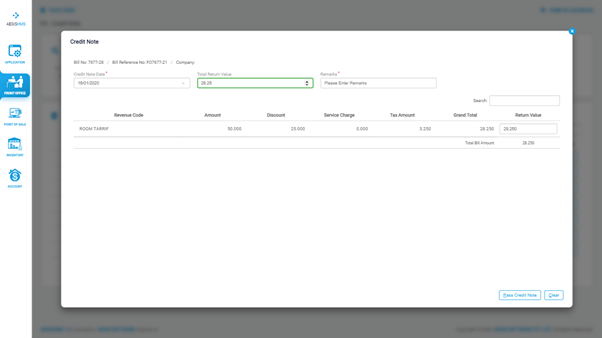
You will see the above screen with information in pop up module. Enter the required date and total return values as well as put valid remarks. Click on pass credit note or just press Alt + P to update. Press Alt + C to exit from the view ticket or click on cross(x) button.
Credit Note Print
To do the Credit Note Re-Print, go to the Front Office >> Transaction >> Credit Note Print.
You will see the following screen. After that, you will see the date. Put the valid date. You will see the credit note list. Select the required credit note list to print. Press print button to reprint the credit note.

Bill Re-print
Take the following steps to reprint a bill:
Go to FO>>Transaction>>bill reprint
>>Select "From date" and "to date" to load bill (Check Invoice List as shown in fig below)
>>Right-click on the Print icon and click Reprint

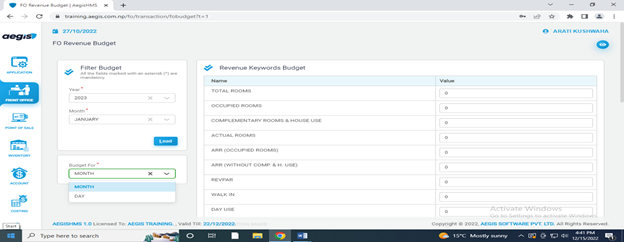
FO Budget:
The starting point in the process of budgeting is the preparation of the sales budget of Front office. The sales budget is the most critical budget because the volume of sales in front office has an important bearing on all variable and semi-variable costs, as indeed on cash inflows and outflows of the business.
Here, we can target FO revenue by budgeting via value input of revenue for the required time period as shown below:
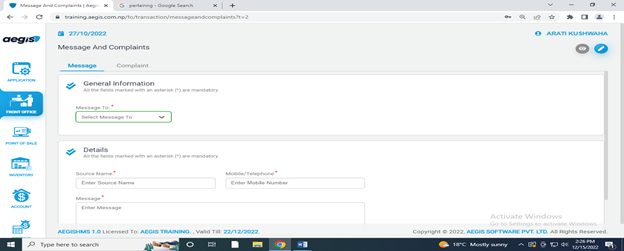
Message and Complaints
To collect Message and Complaints, go to Front office >> Transaction >>Message and complain>>message.
You will see the following screen fill the required fields and press Ctrl+ S to save the information.
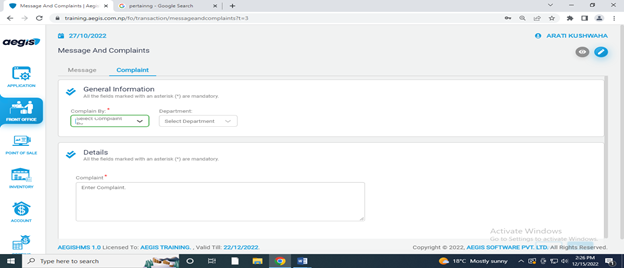
Complain:
To collect Complaints, go to Front office >> Transaction >>message and complain>>complain You will see the following screen fill the required fields and press Ctrl+ S to save the information.