Bill entry
Bill entry
To add Bill entry, Go to Account >> Transaction >> Bill Entry
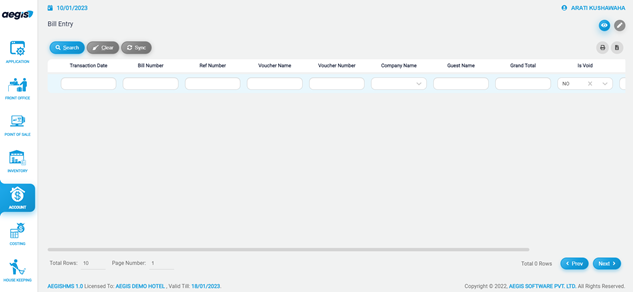
Just after you click on the Bill entry, you will see the following screen. On the top right side, you can see two icons. Each icon has a different function in the system. If you click on the ‘Eye’ icon, it will show you the list of Bills as shown below. You can also press Alt + 1 to open an ‘Eye’ icon.
To add a Bill, you can click on ‘Pencil’ or press Alt +2. After that, you will see the following screen, then fill in all the required fields as per requirements to create bill,
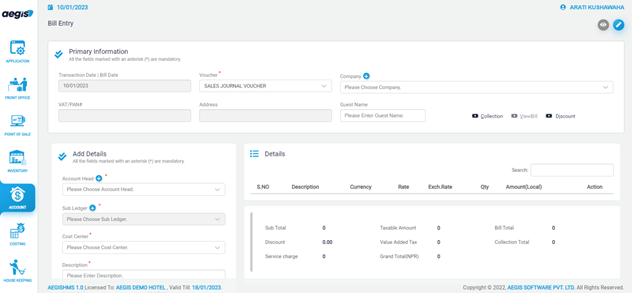
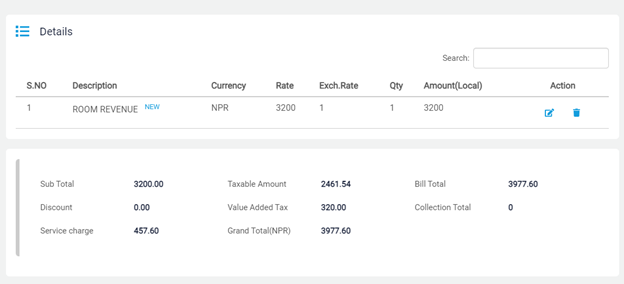
In ‘Add Details’, you are required to fill the information marked as required by the system like ‘Account Head’, ’cost center’, ’Description’, ’Currency’, ’quantity’, ’rate and tax’. After completion of required fields you can add the given Bill by clicking on ‘Add’. The entered Bill will appear on the Detail Section as shown below:
At last, you must write a narration for every Bill and save it by pressing Ctrl+ S or as per the info shown on the page. After saving the bill click on eye icon to view the saved bill which can be printed as well, After saving or at the same time of saving.