Credit Note
Credit Note
To add credit note posting, Go to Account >> Transaction >> Credit Note
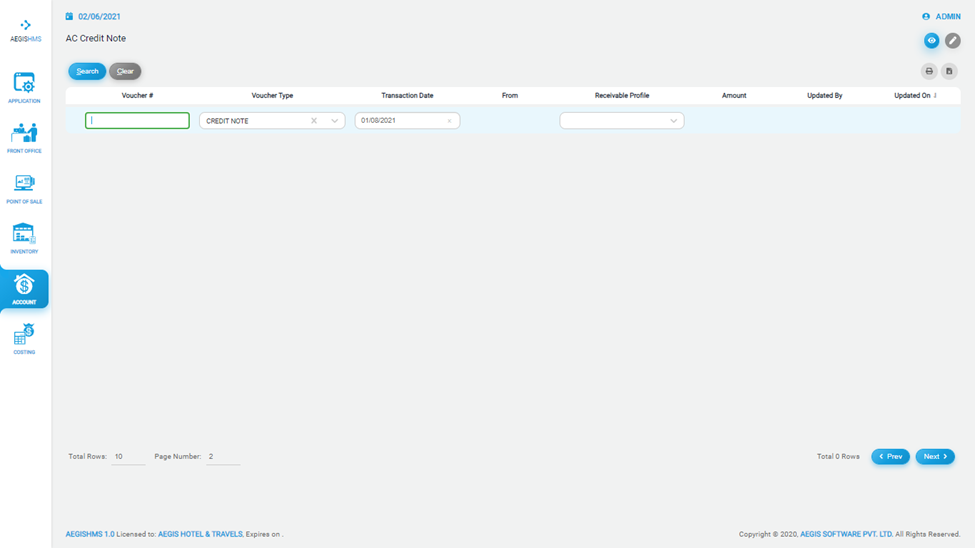
Just after you click on the Credit Note, you will see the following screen. On the top right side, you can see two icons. Each icon has a different function in the system. If you click on the ‘Eye’ icon, it will show you the list of credit note. You can also press Alt + 1 to open an ‘Eye’ icon.
You can also filter the list by ‘Voucher number’, ‘Voucher type’, ‘Transaction Date’ and ‘Receivable Profile’.
After that, you will see the list of credit note as given below:
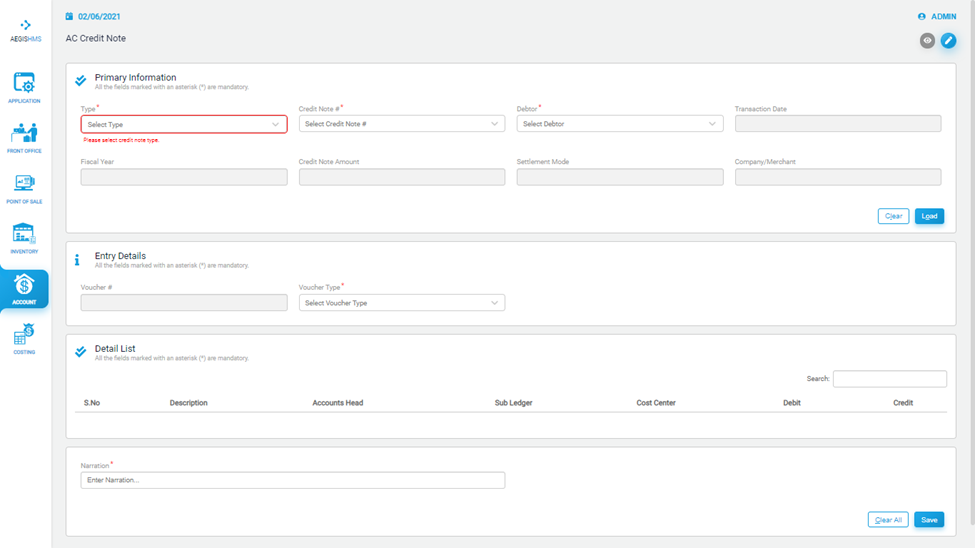
To edit the credit note, you can click on ‘Pencil’ or press Alt +2. After that, you will see the following screen, then fill in all the required fields.
At first, you need to fill in the information form the ‘Primary Information’. You have to select the credit note type from the ‘Type’ field, credit note number from the ‘Credit Note’ field, and debtors from the ‘Debtor’ field.
After that, the system will automatically update the fiscal year, credit note amount, and date of transaction. Then, you can load the posting by clicking on ‘Load’ or press Alt + L. You can clear the posting by clicking on ‘Clear’ or with Alt + C.
The credit note you loaded will appear on the Detail List. At last, you must write the narration of posting and save it by pressing Ctrl+S. If you want to clear the transaction, you can click on the ‘Clear all’ button.